Tools
Gunpla Tools for Beginners: What to Buy First (2026)
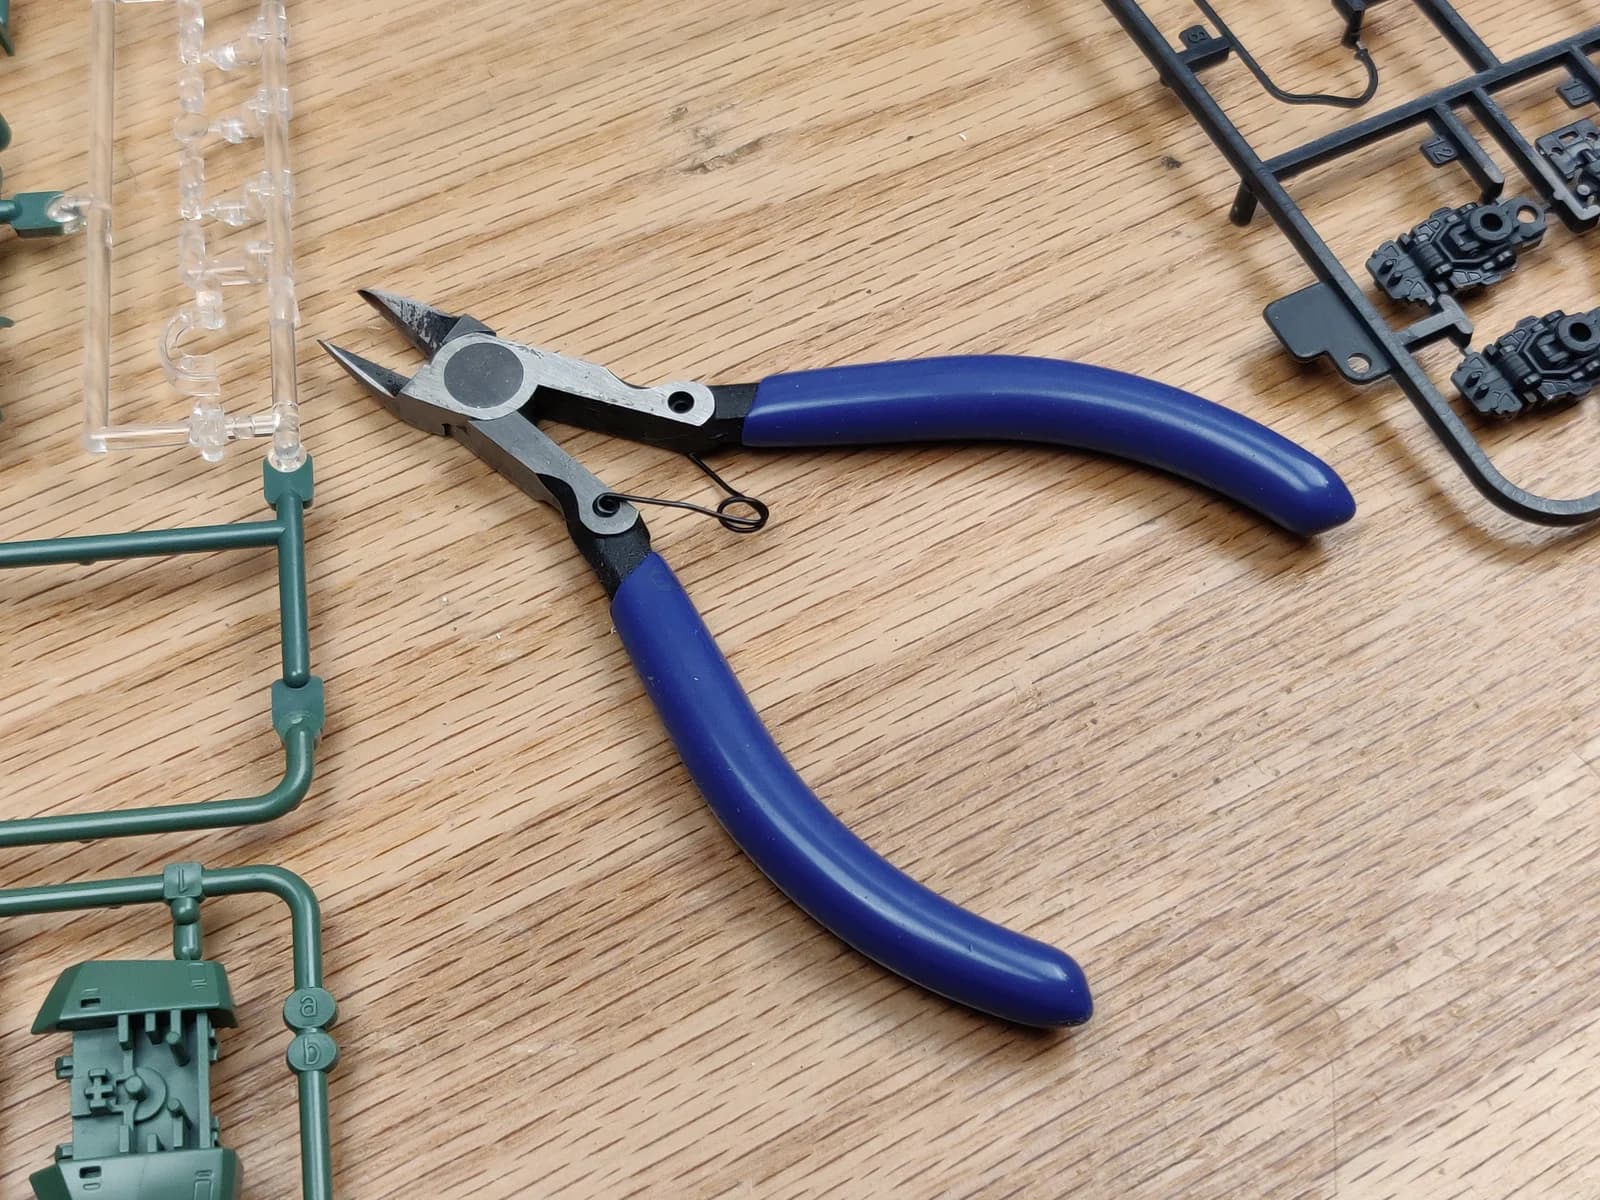
Gunpla tools for beginners come down to one purchase: a nipper made for plastic runners. Everything else, from sanding sponges to panel-line markers, is a finishing step you can add later. This guide lists the tools in the order a first-time builder needs them, using the makers' own specs and the US shop prices we checked on October 11, 2026.
TL;DR: Buy a single nipper first; Bandai's Entry Nipper was $12 at Newtype. Add a $3.50 Gundam Marker GM01 for panel lines and a $10 pack of GodHand sanding sponges when you want a cleaner finish. Premium nippers like the Tamiya 74123 ($48 at Gunpla Style) and GodHand SPN-120 ($59.95 to $61.75) are upgrades, not starting gear. Bandai says some Entry Grade items need no tools at all.
Header photo: side cutters sold for Gunpla, next to Real Grade Zaku II runners. Gravis / Wikimedia Commons, CC BY-SA 4.0
Key Takeaways
- One tool is enough to start. Bandai's assembly tips say some items, including Entry Grade, need no tools; the parts come off by hand.
- Starter nipper: Bandai Entry Nipper, $12 at Newtype on October 11, 2026.
- Clean-up and panel lines: GodHand KB10000 sponges ($10), Gundam Marker GM01 ($3.50), Tamiya Panel Line Accent Color ($7), all at Gundam Planet.
- Upgrades: Tamiya 74123 Sharp Pointed Side Cutter ($48 at Gunpla Style) and GodHand SPN-120 ($59.95 to $61.75).
- Read the warnings. GodHand limits the SPN-120 to plastic runners and says to cut thick gates in two stages.
Gunpla tools for beginners: the quick answer
You need a nipper (a small side cutter for plastic) and nothing else to build almost any Gunpla kit. Bandai's own assembly tips say: "Some items including ENTRY GRADE do not need any tools ! You can take them with your hands." The same page tells you to cut the parts you need "from the sprue frame (runner)" for everything else.
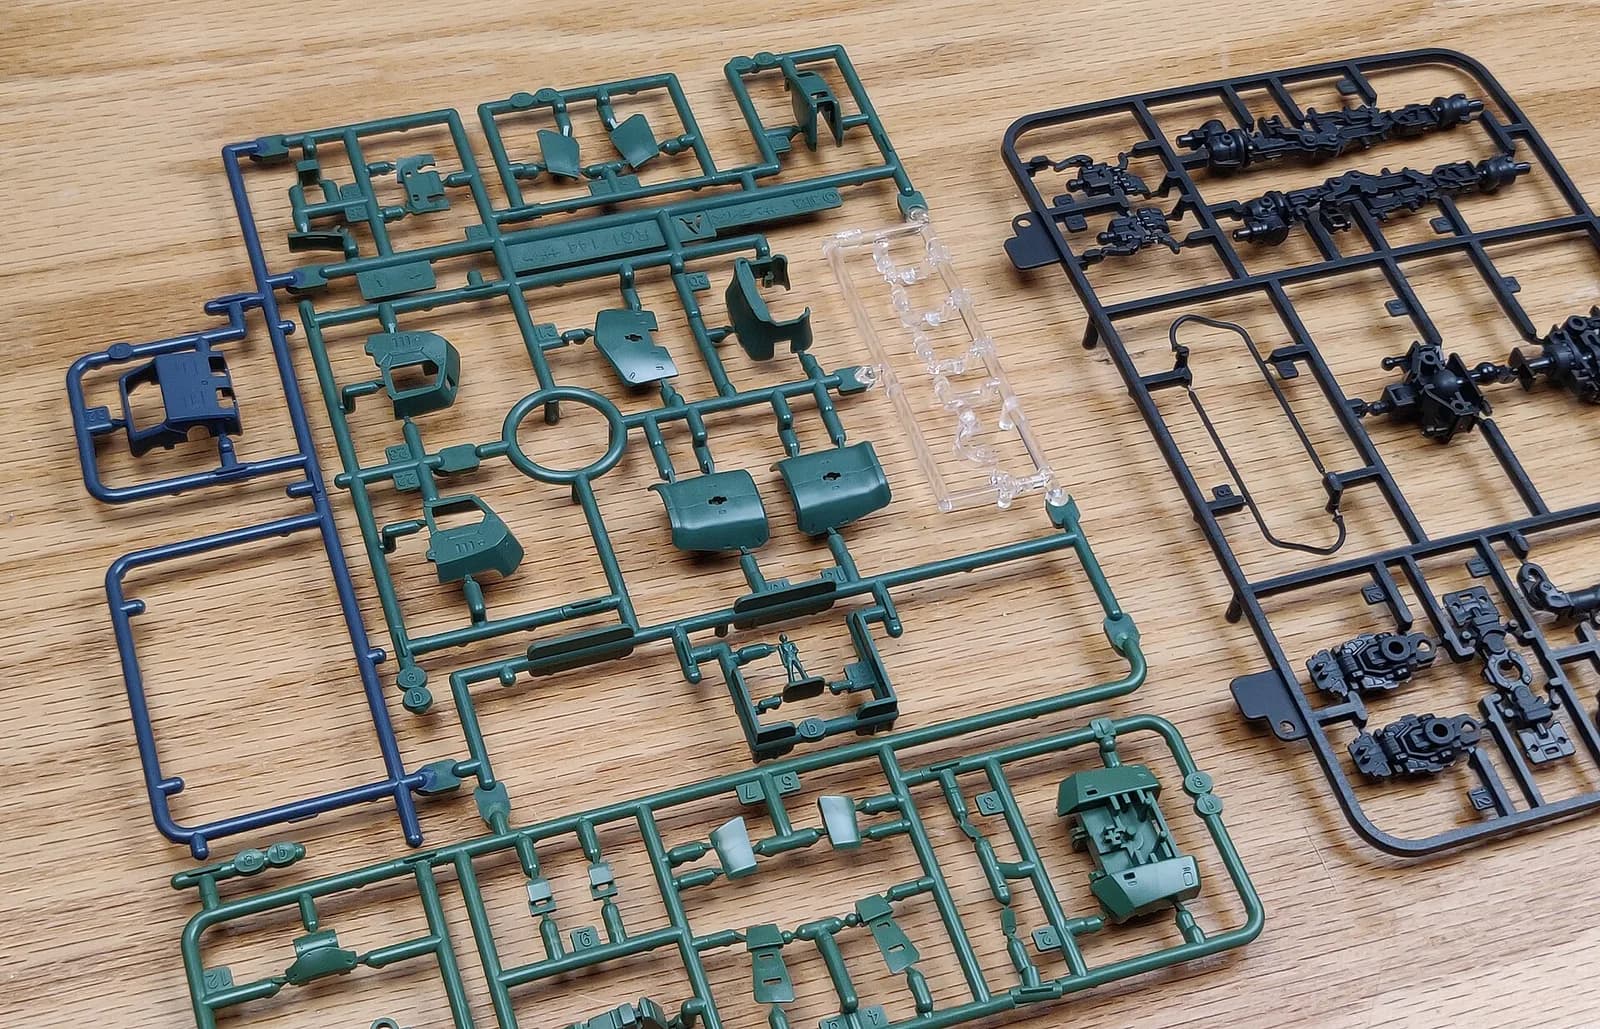
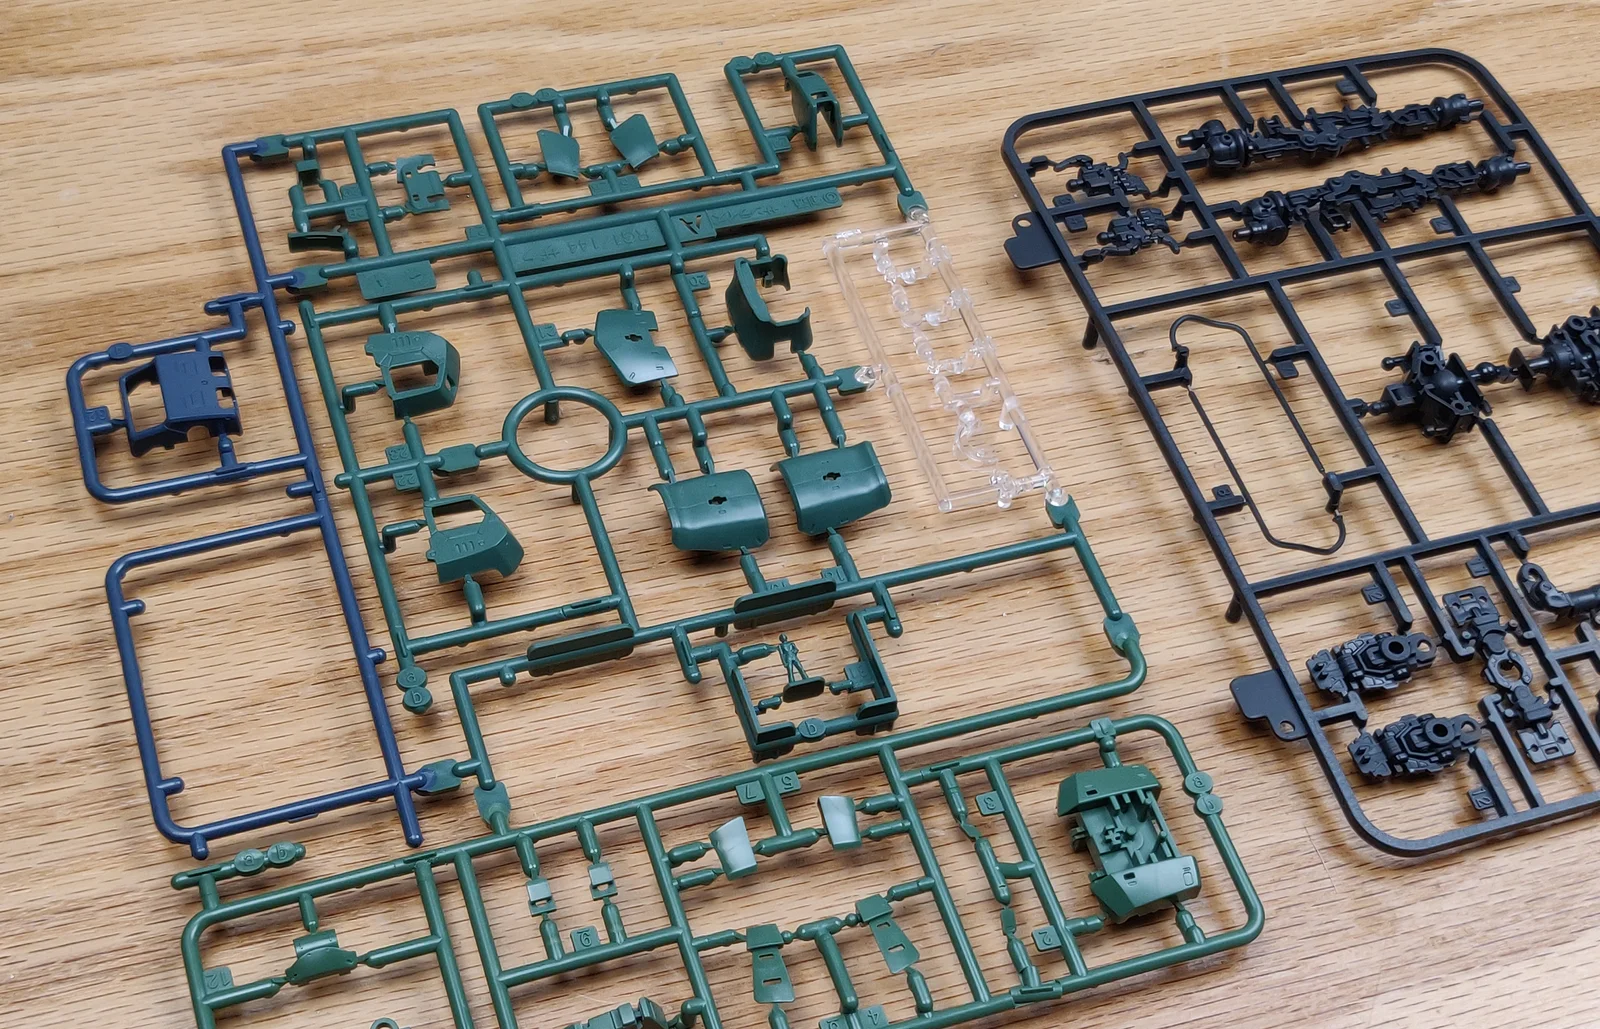 Parts still on their runners (sprues), ready to be cut. Photo: Gravis / Wikimedia Commons, CC BY-SA 4.0
Overview: what each tool does
Every Gunpla kit arrives as plastic parts attached to runners, also called sprues. The point where a part joins the runner is the gate. Cut the gate and you have a part, plus a small leftover bump called a nub.
The tools in this guide map onto that process:
- Nipper: cuts parts off the runner.
- Sanding sponge or file: smooths the nub and rough edges.
- Panel-line marker or wash: darkens the molded lines so details stand out.
- Tweezers: place small stickers.
If you have not picked a kit yet, start with our Gunpla grades explained guide. Bandai says some Entry Grade items need none of the above.
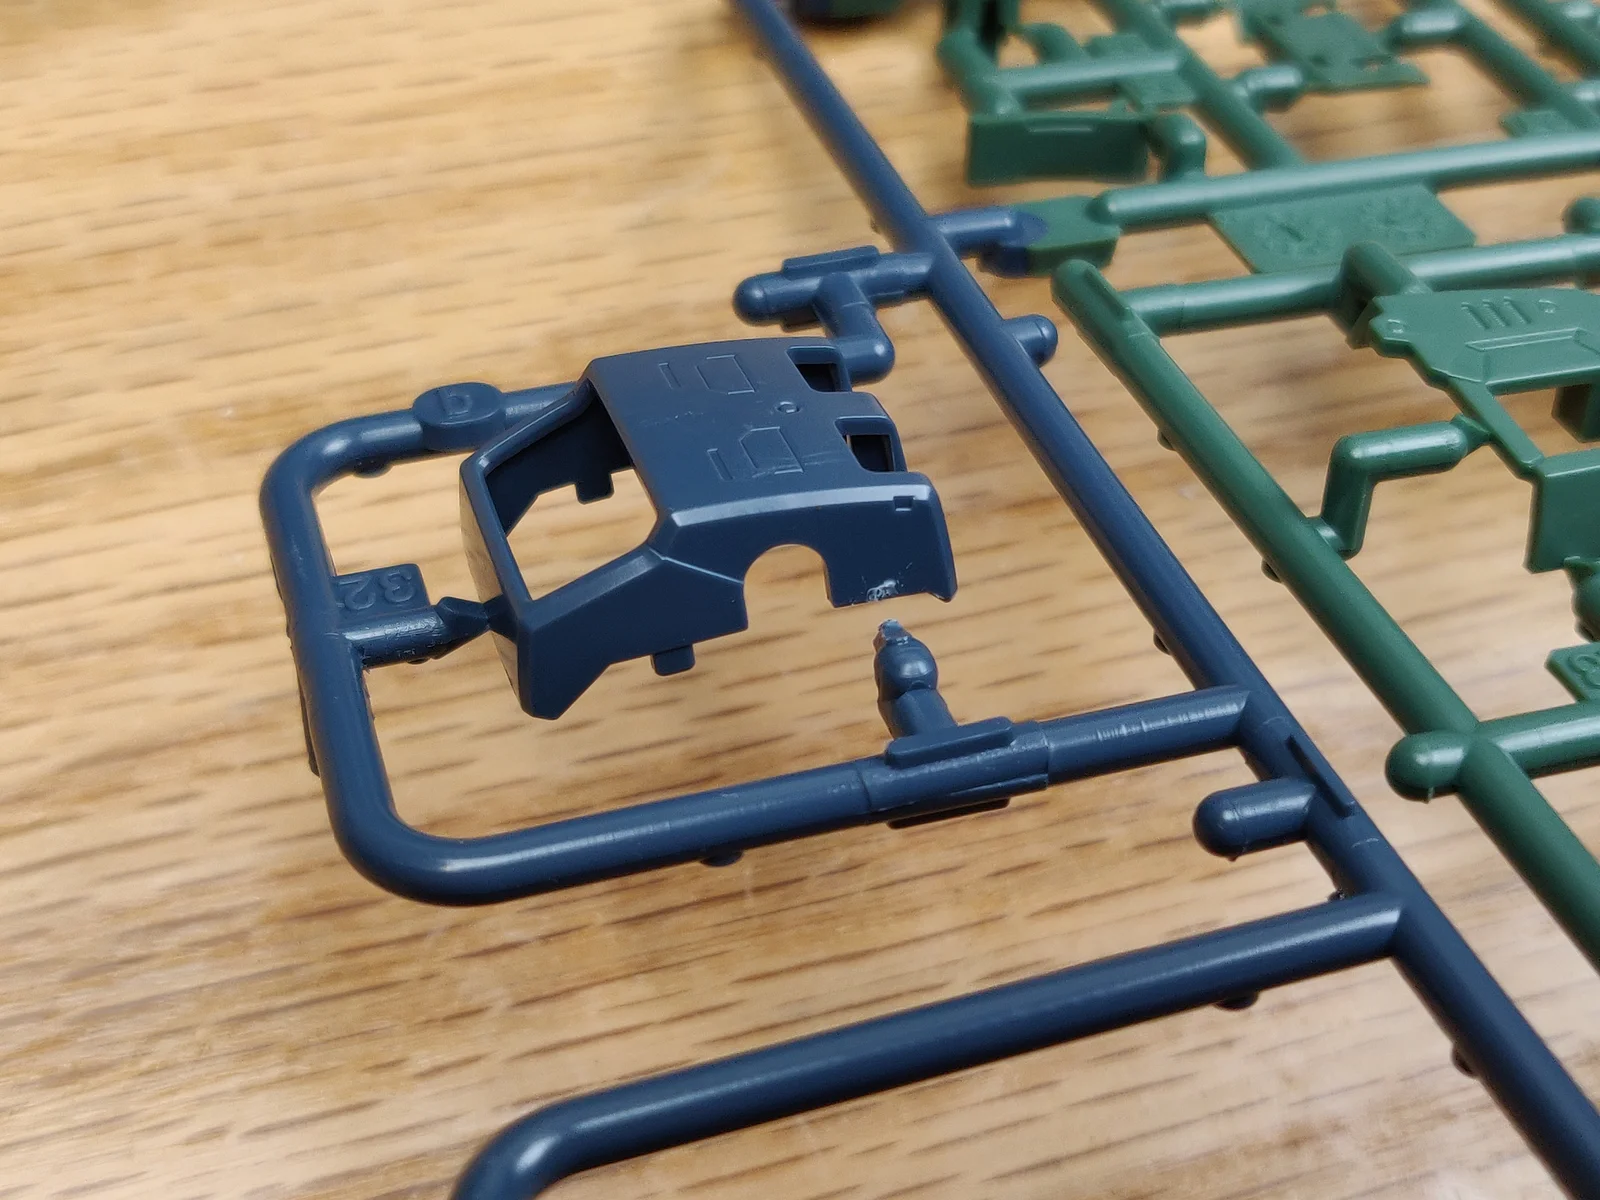 A part cut free, with the nub left at the gate. Photo: Gravis / Wikimedia Commons, CC BY-SA 4.0
The tools, in the order you need them
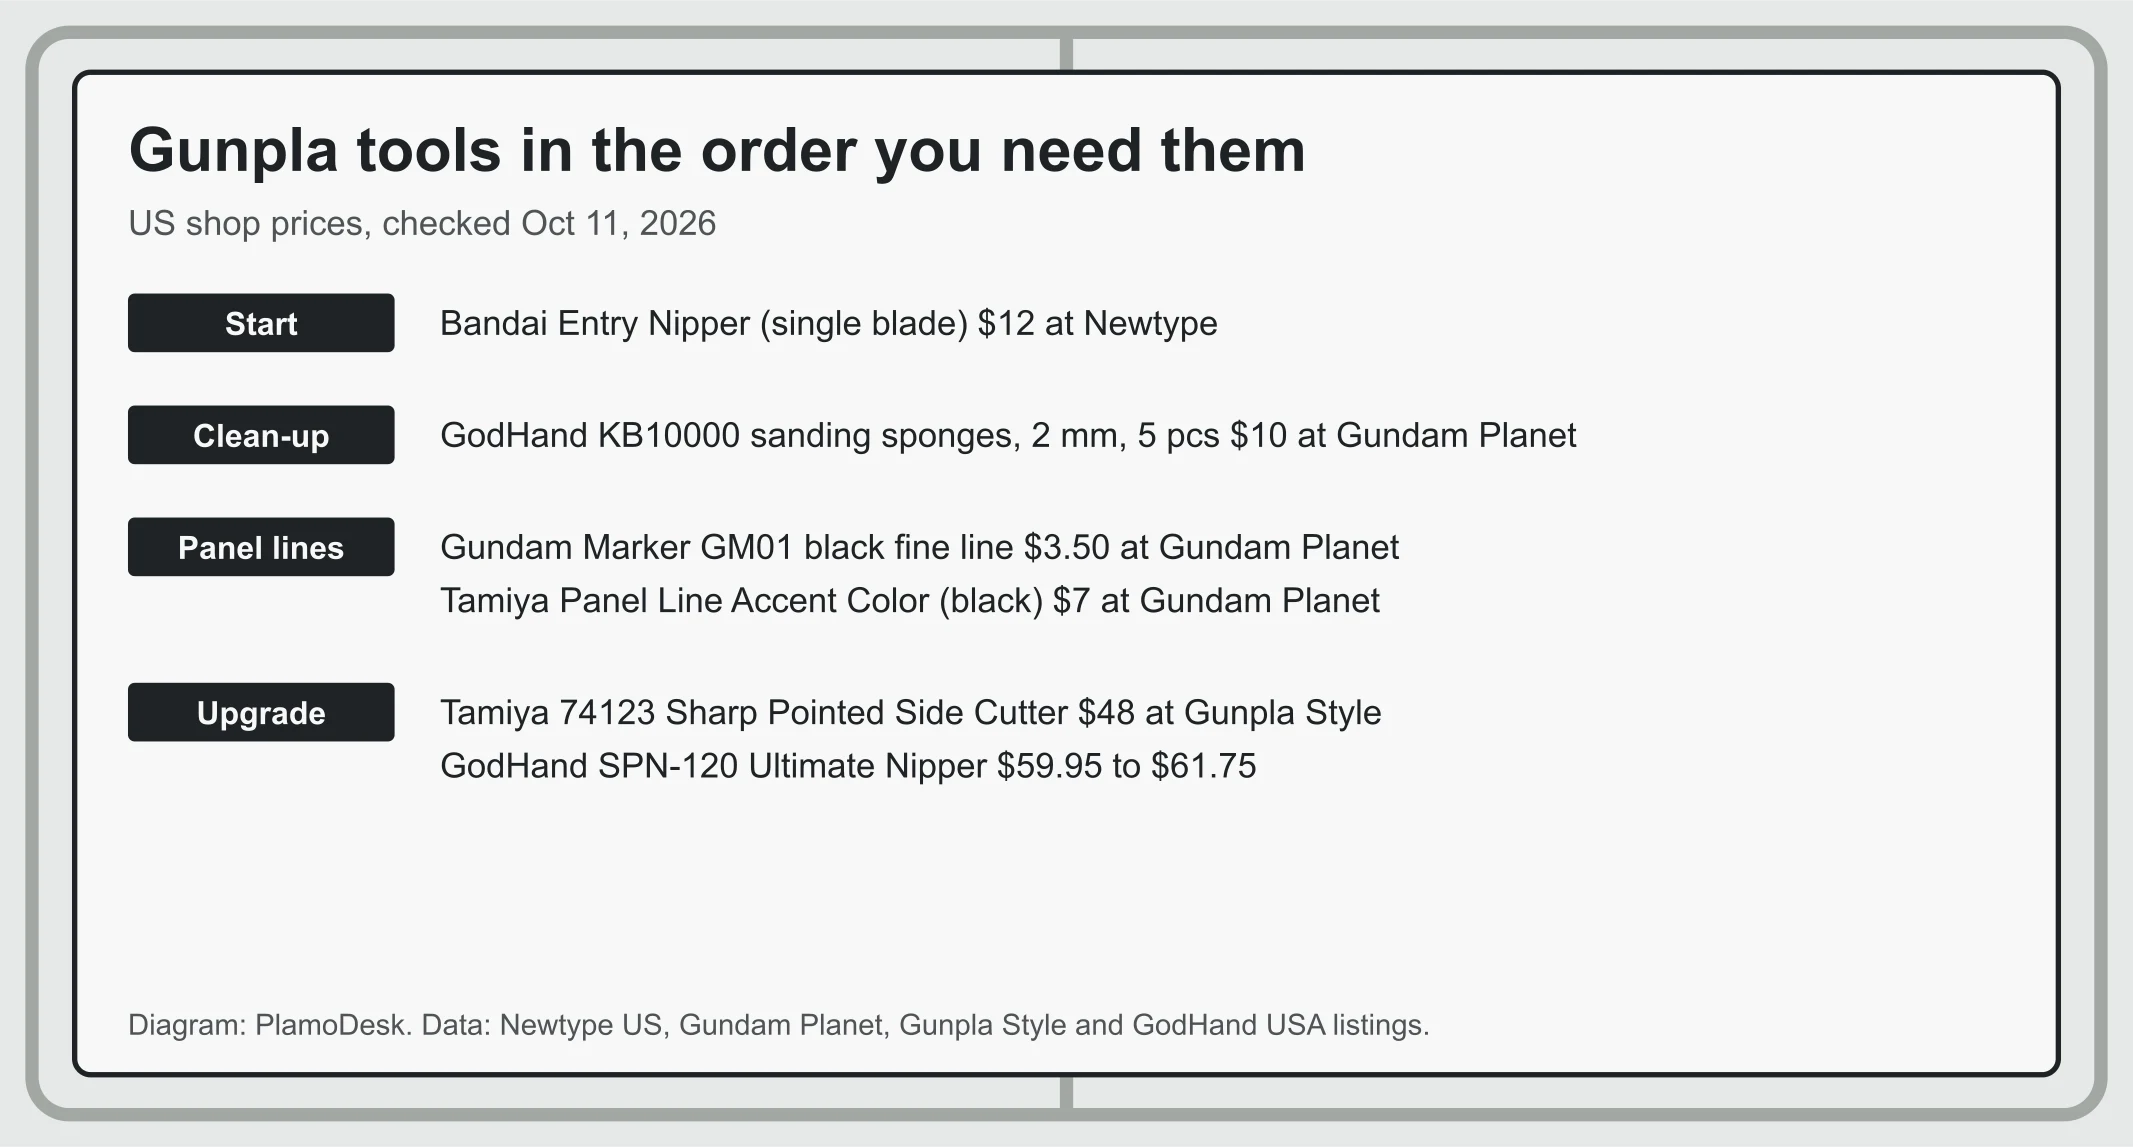 Diagram: PlamoDesk. Data: Newtype, Gundam Planet, Gunpla Style and GodHand USA listings, checked October 11, 2026.
Start: Bandai Entry Nipper ($12)
Newtype's listing had the Entry Nipper in stock at $12 on October 11, 2026, and describes it as "Perfect for those who are just getting into building model kits and Gunpla." The listing calls it "an entry level set of nippers" from Bandai.
Clean-up: GodHand KB10000 sanding sponges ($10)
Bandai's tips page says "For more clean finish, you can use sand the parts to remove rough edges." Gundam Planet sold GodHand's KB10000 sponges at $10 for five pieces, "Each piece is 2mm thick."
Panel lines: Gundam Marker GM01 ($3.50) or Tamiya Panel Line Accent Color ($7)
The GM01 black fine line marker was $3.50 at Gundam Planet. Its listing explains the method: "Just draw in the panel lines with this marker and wipe away the excess ink with a rubber eraser, paper towel, or even your finger!" A fine-point Mr. Hobby panel-line marker was listed at $6 on the same site.
Tamiya's Panel Line Accent Color is the step after markers. Tamiya says "One bottle contains 40cc enamel paint. The bottle's cap features a brush for easy application," and recommends using it on Tamiya Color lacquer or acrylic paints. Gundam Planet had the black at $7.
Upgrade: Tamiya 74123 ($48) and GodHand SPN-120 ($59.95 to $61.75)
Tamiya's 74123 Sharp Pointed Side Cutter "is designed to remove plastic model parts from their sprues," with slim blades for "easier removal of smaller parts with less clearance." It is 115 mm long. Gunpla Style had it in stock at $48 and adds: "Protective equipment is highly recommended."
GodHand's SPN-120 Ultimate Nipper is sold as "Ultra thin single edged! Ultimate Sharpness!" It cuts "3mm or less (PS, PP, ABS, PE resin) 1mm or less (transparent, semi-transparent)" and comes with a protection cap. It was $61.75 at GodHand USA and $59.95 in stock at Newtype on October 11, 2026.
GODEEPER: Picking your first kit to go with the nipper? Best beginner Gunpla kits by budget →
Step-by-Step: building your first kit with basic tools
These steps follow Bandai's own assembly tips, with the tool notes from the makers above.
1. Check the parts and read the manual. Bandai's tips: "Before beginning assembly, check the set contents and read the assembly manual for a smooth process."
2. Cut only the parts the current step needs. Bandai says to follow the manual and "cut out the necessary parts from the sprue frame (runner)."
3. Cut thick gates in two passes. Newtype's SPN-120 listing says: "Avoid twisting or cutting thick gates in one motion; instead, cut in two stages for best results." The same habit protects a cheap nipper.
4. Smooth the nub. Sand any rough edge left at the gate, as Bandai's tips suggest. GodHand's KB10000 sponges are 2 mm thick.
5. Assemble with the parts facing the right way. Bandai: "assemble them while making sure they are facing correctly." Check the manual's drawing before you press a part home.
6. Add stickers and panel lines. Bandai says "It's easier to attach smaller decals with tweezers." Draw panel lines with a GM01 and wipe the excess.
Tips: looking after your tools
- Use nippers on plastic runners only. Newtype's SPN-120 listing says it is designed only for plastic model runners: "do not use on metal, polycarbonate, or resin, as this may damage the blade."
- Keep the cap on. Newtype's SPN-120 listing says the blade "is extremely sharp and delicate" and to store it "with the blade guard attached when not in use."
- Mind the cutting limits. For the SPN-120, 3 mm or less on PS, PP, ABS and PE plastic, and 1 mm or less on clear or semi-clear parts.
- Wear protective equipment. Gunpla Style's note on the Tamiya cutter says it is "highly recommended."
- Buy the expensive nipper second. A $12 nipper teaches you how you cut before you spend $48 or more.
What builders say
Reddit was not readable from our side on October 11, 2026. These quotes come from customer reviews and the Q&A section on Newtype's product pages, read in full that day.
- On the GodHand SPN-120, reviewer Thegreebler (October 7, 2026): "It's the godhand, it's peak. Follow the instructions or it will break, this is not indestructible like an entry nipper."
- On Bandai's Entry Nipper, reviewer Leviathan (June 24, 2025): "Good single blade nipper."
- Answering a question on the SPN-120 page, ZeonicTitan (July 4, 2023): "Yes to both. As long as the gates are under 3mm across and you don't use the blade tip to cut harder plastics…"
The first and third quotes match the care notes on Newtype's SPN-120 listing: a premium nipper is sharper and also easier to damage.
GODEEPER: Cheap tool sets and cheap kits on marketplaces have something in common. How to spot bootleg Gunpla →
Our take
Based on the makers' specs and the prices above, a first-time builder should spend about $12 on Bandai's Entry Nipper and stop there until the first kit is done. If you enjoy it, add a $3.50 GM01 marker and a $10 pack of sanding sponges, for $25.50 in total at the prices we saw. The Tamiya 74123 and GodHand SPN-120 cut cleaner according to their makers' and sellers' pages, but both come with care instructions that a beginner can easily break, as one SPN-120 reviewer warns. Buy them once your cutting habits are set.
How we checked this
On October 11, 2026 we read Bandai's English assembly tips, Tamiya's official product pages for the 74123 cutter and the Panel Line Accent Color, and GodHand USA's SPN-120 page. US prices and stock labels come from Newtype, Gundam Planet, Gunpla Style and GodHand USA listings read the same day. Tamiya USA's site blocked automated reads, so we do not quote its prices. The quotes are from Newtype product pages. We did not test these tools ourselves. The source table has 36 rows.
Frequently Asked Questions
What tools do I need for my first Gunpla kit? One pair of plastic nippers is enough for most kits. Bandai's own assembly tips page says some items, including Entry Grade, need no tools at all because the parts come off by hand. Bandai's Entry Nipper was $12 at Newtype on October 11, 2026. Sanding sponges and a panel-line marker are optional next steps.
Are expensive Gunpla nippers worth it? Only once you know you will keep building. The GodHand SPN-120 was $59.95 at Newtype and $61.75 at GodHand USA on October 11, 2026, against $12 for Bandai's Entry Nipper. The GodHand is single-edged and ultra thin, but its listings limit it to plastic runners and gates of 3 mm or less.
Can I use regular household scissors or wire cutters on Gunpla? Use a cutter made for plastic runners. Tamiya says its 74123 side cutter is designed to remove plastic model parts from their sprues. Newtype's listing for the GodHand SPN-120 warns not to use it on metal, polycarbonate or resin. A $12 Bandai Entry Nipper was the cheapest of the three cutters we priced.
How do I do panel lines on Gunpla as a beginner? Start with a fine-tip marker. Gundam Planet's listing for the GM01 black fine line marker says to draw in the panel lines and wipe away the excess ink with an eraser, paper towel or finger; it was $3.50 that day. Tamiya's Panel Line Accent Color, $7 at Gundam Planet, is enamel paint with a brush in the cap.
Do I need sandpaper for Gunpla? Not for a first build, but it helps. Bandai's assembly tips say you can sand the parts to remove rough edges for a cleaner finish. GodHand's KB10000 sanding sponges, 2 mm thick in a pack of 5, were $10 at Gundam Planet on October 11, 2026.
Do I need tweezers for Gunpla stickers? They help with small ones. Bandai's assembly tips say it is easier to attach smaller decals with tweezers. That is the only tool Bandai's tips page names besides cutting and sanding, so add a pair once you have a nipper and are ready for the sticker step.
Related Reading
- Gunpla Release Schedule 2026: when the kits you will use these tools on come out.
- Gunpla Releasing in November 2026: the next month's kits, with Japan prices.
- Gunpla release calendar: three months of the official schedule in one list.
References
- Bandai Hobby: How to Build (assembly tips)
- Tamiya 74123 Sharp Pointed Side Cutter and Tamiya Panel Line Accent Color, official product pages
- GodHand USA: SPN-120 Ultimate Nipper
- Newtype: GodHand SPN-120 and Bandai Entry Nipper, listings, reviews and Q&A
- Gundam Planet listings: GM01 marker, Panel Line Accent Color, KB10000 sponges, Mr. Hobby marker
- Gunpla Style: Tamiya Sharp Pointed Side Cutter
Was this guide helpful?
About the author

Editorial desk
The PlamoDesk desk. Every article is built from a source file: Bandai Hobby schedule and item pages, maker pages for tools, dated US shop prices and quoted builder comments, each linked in the article.
Keep reading
Best Beginner Gunpla Kits by Budget: Under $20, $40, $70
Beginner Guides · 9 min
Gunpla Grades Explained: HG, RG, MG, PG and More (2026)
Beginner Guides · 14 min
New Gunpla Releasing in November 2026: Bandai's 18-Item List
Release Calendar · 9 min
Gunpla Release Schedule 2026: How to Read Bandai's Calendar
Release Calendar · 14 min
How to Spot Bootleg Gunpla Before You Pay (2026 Guide)
Buying Guides · 9 min
Disclaimer
This article is published for informational and entertainment purposes. It does not constitute professional financial, legal, or technical advice. Game performance, online services, patch schedules, and store listings change. Verify critical details (pricing, system requirements, regional availability) with publishers and storefronts before you buy. Affiliate links, where present, help support our editorial work and are labelled in our affiliate disclosure.